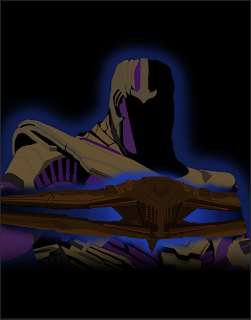
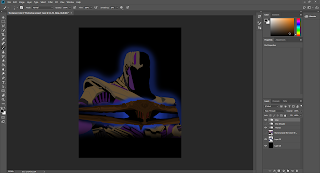
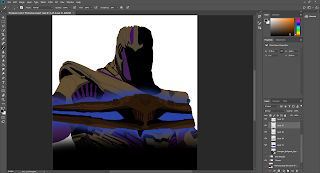
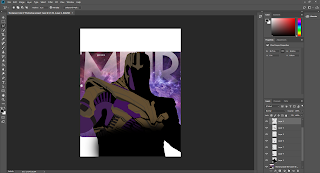
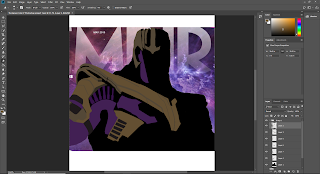
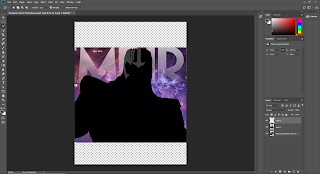
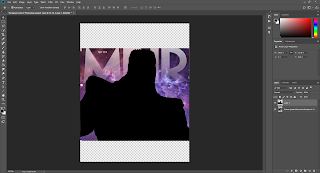
Posts

Showing posts from October, 2019

Day 33 - Tutorials

I've learned that the term Rotoscoping can be referring to multiple things, The two I've seen the most are animation like I talked about last post as well as, as the website i found put it; " basically the process of drawing around an object, character, or other part of your scene so that you can isolate it." This link here is to one of the websites i found referring to the isolation of a character to in many instances add text or other things in behind a character. https://motionarray.com/tutorials/after-effects-tutorials/how-to/how-to-rotoscope-in-after-effects-the-basics-after-effects-tutorial There's another website that I've found that has a really simple tutorial for the animation that still results in a really cool fluent animation, found here; https://theblog.adobe.com/moving-art-how-to-create-a-rotoscope-animation-in-photoshop-cc/ I don't know what program I'll be using yet, It depends on the tutorial i find but Photoshop, After ef

Day 32 - Rotoscoping

With the Thanos Project done I needed to find some new projects and something I've come across; Rotoscoping, is something to truly behold. It's a type of animation that is essentially the tracing of a performance but the results from what I've seen can be absolutely amazing There's a video I found that's almost a history of Rotoscoping, found at this link:  https://www.youtube.com/watch?v=gMjucU3YQQU It further explains what exactly it is and in the video it talks about the visually stunning movie Scanner Darkly. It Features some pretty big movie stars like Keanu Reeves, Robert Downey Jr. and Woody Harrelson, Which is actually why I'm excited about this because Actors of this scale participating in something like this means it's a rather large and important thing. I don't know exactly what I'll be doing but It's definitely an interesting animation style that, like the Thanos project, I would like to attempt myself  Here's the Link to th

Day 31 - Complete for now

Image
The project for now, is complete. The reason why I say for now is because I would like to do more to it but I don't have anything in mind as of now and I don't want to waste time just thinking of what I could do Thanos With the ship Thanos Without the ship  (I felt like he's a good project on his own too) I'll have to do a little searching on what to do next but for now Thanos is a finished project. I'm super happy with it especially the ship. It's the small little red details that I added that I feel like really make it look awesome. Some other ideas i had were to add Gamora and Nebula, Thanos' daughters instead of the ship but I felt like that would be very time consuming. if I ever have lots of free time maybe I'll add them In behind the ship.

Day 30 - Almost complete

Image
This project is very close to completion. I have the majority of the background done other than small details and the ship also needs a little work but other than that, It's looking great The only issue I'm encountering is making the ship look like its contained in Thanos because right now it looks like its just placed over him. Something like having the ship background a different colour or making it a dark edge so you can really see there's a difference. Either way I think it looks really good so far

Day 29

Image
The ship is very close to completion and it's looking really good. I might be able to finish it tomorrow and possibly start the background  The glow around the ship will also be behind Thanos. I intend on making look more like it's in space, Like the original pictures for both the ship and Thanos are set in. Should give a really cool result by completion 

Day 28

Image
I've added on to the ship and i must say, the new ship in comparison to the old one is amazing in my opinion This is the old ship, which seems very bland and boring, but the new one is not only more in-line with Thanos but just looks incredible and it's not even done I can't wait to add more to the ship and give it that complete look because I cannot say enough how happy I am with the ship so far. The final part of this would be adding the backgrounds for both the whole piece and the ship to make it look like it inhabits the area in Thanos, because that's the final look, to have one image in another. It should look really good if I can do that part right

Day 27

Image
I've had to restart just a little. Originally when making the ship, I noticed that It didn't match very well.The way I did the shapes were far too different in my opinion This is how the ship looks now, and already in my opinion it looks more to theme with Thanos, I'll be redoing the steps I took with the original, but making them more in line with, again, what i did with Thanos. I kept the original ship layers under "Ship (Rough), with the layers I'm currently working on being under "Ship". I believe I can remake the pieces pretty easily, I want to do this right like I've previously mentioned so if I need to restart to make it look better then I'll take that risk 

Day 26

Image
I've made a lot of progress on the ship, I'm at the same point where i was at with Thanos which is really just trying to figure out what part of the ship should be what colour and shape and so on I'm actually pretty impressed with how this is going so far, i'll be changing the colour of the ship later, right now it's just getting the shape down. Another thing i haven't really considered yet would be the background of both the ship, which is partially already there, and the background of the whole poster. It'll most likely end up being some space related background 

Day 25

Image
I Think I've finished Thanos. I've done everything I've done everything I think I need to do that will be showing  This is what the final result looked like (The background was from the original picture of Thanos, that's why its absent here) Now ive started what will be the other part of this project; The internal pictures. This is the outline of Thanos' Ship from the movie Avengers Infinity War. I've decided to add only this image, not other characters, I feel like its a good fit to have only the ship here. To be honest i don't have a plan on how to do this so tomorrow I'll see what i can figure out. I was thinking some sort of layer masking but we will see

Day 24

Image
good amount of progress today, i finished the left part of the torso (his right) and added that gradual dark effect on the bottom where the images will go. not a lot left to do on Thanos himself but the other images will for sure take some effort. possibly starting on that part tomorrow, at the least finishing him tomorrow

Day 23

Image
Basic amounts of progress done today. finished the arm and started moving on to the torso, which wont have as much detail because I'm adding that internal imagery around that area. The face probably wont have any detail, It's actually an accident that the face looks like that, as if there was a shadow on it because i accidentally hit the fill option too early but it worked very well

Day 22

Image
Today not a lot of progress was made on the armour, my attention was focused more on figuring out what part should be what colour. I'm starting to get really pleasing result though and I think it looks really cool His chest and face region like I said previously will be where the internal images will go, Which I've decided will be his Ship from the Movies Avengers Infinity War and Endgame; Sanctuary II, and the other villians that work for him throughout those films.

Day 21

Image
i started planning out what i want out of this poster, and I think Im gonna keep the focus on Thanos, He's such a key player in the movies that i feel like he can have his own poster with his own supporting characters in it Here's a look at what i got so far. ill have his chest and face region faded out and thats where the internal images will be. I'm most likely being really ambitious with this but i really like the look of it so far so im going for it

Day 20 - slow day

Image
Due to some computer troubles i had no time to get work done As you can see i have started the shape of the armour, I"m not doing every part of the armour, by the end it'll only be the pieces on the edge to give it a look like theres a reflection and the rest is in shadow. I plan on doing alot more tomorrow

Day - 19 Starting what could be very tedious

Image
I've got my basic idea of what i want to do for the poster, have thanos as the main shape with other characters inside of it. the reason why i call this tedious is because i need to have the shapes of his armour drawn, and he has a very shapely armour to say the least.  That is what my basic outline looks like so far, ill start on the armour shapes tomorrow 

Day 18 - Levente Szabo

Image
Levente Szabo, makes some incredible artwork. He bases the work on one main point of say the film, for example, the lord of the flies one here: He has the main focus of the movie, the pig head as the overall shape of the poster, with accompanying parts, like the island it takes place on. I want to do an Avengers Endgame style poster, with the main villain Thanos as the overall shape, and our heroes inside him. There's a tutorial for this found at this link for these kinds of artworks:  https://www.digitalartsonline.co.uk/tutorials/photoshop/incredible-bafta-2016-poster-step-by-step/#1 As soon as i saw this work I fell in love with it, the vibrant colours that make the objects really pop on the page, I would love to make something even remotely close to this

Day 17 - Goodbye to Envatotuts (For now)

Image
I've finished the text tutorial and my results weren't bad, but not exactly what i was going for: It's not bad by any means, my only issue is that there's so much of a gap between the text an it doesnt show the image well. I've gotten all my work from Envatotuts, its a great website for photoshop tutorials, but ive been shown some incredible art that i will share tomorrow that i want to try

Day 15 + 16

Image
Day 15 I finished my second sketch project and i am much happier with the final result  I found that using a picture with simpler lines helps tremendously, along with another thing, the first filter you apply to get the base sketch lines has you put the detail to only 1, i found that putting it to 4 gives a good result. I found another tutorial that i would like to try next, link is here:  https://design.tutsplus.com/tutorials/how-to-create-a-photo-to-art-text-effect-photoshop-action--cms-33384?_ga=2.197232943.1229295620.1570030651-1148022752.1569273012 Day 16 I've started the tutorial, haven't gotten too far on it yet, I'm at the point just before you add the text As you can see not a lot has been visually done but you can see some of the layers that come into play. The font being used had to be downloaded and is called Montserrant, specifically the Black version

Day 14

Image
I've Finished the Sketch drawing but i wasnt happy with the final result. I Decided to go back to that layer that made it have the clean lines and settled for that one I Still wasn't Happy with it so I started a new one, and i am very very happy with what i have now another thing is that my Desaturation has for some reason started to work again and i was able to use that in this version of the sketch drawing. The only problem i have left, if i even want to still do it at this point, is to figure out how to add the colour portion